
This tutorial will guide you through the process of creating a Cookie Consent Popup in Javascript. This popup is essential for websites to comply with privacy regulations like GDPR by informing users about the use of cookies and obtaining their consent. A well-implemented cookie consent popup enhances user trust and ensures legal compliance.
Adding Header Assets
First, include necessary CSS assets to style the popup. Place these within the <head> section of your HTML file.
<link rel='stylesheet' href='https://fonts.googleapis.com/css2?family=Poppins:wght@100;200;300;400;500;600;700;800&display=swap'>
Creating the HTML Structure
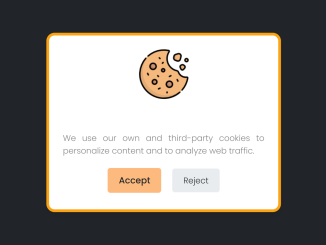
Next, set up the basic HTML structure for the cookie consent popup. This includes the container, image, text content, and buttons for accepting or rejecting cookies.
<html lang="en">

<head>
  <meta charset="UTF-8">
  <meta http-equiv="X-UA-Compatible" content="IE=edge">
  <meta name="viewport" content="width=device-width, initial-scale=1.0">
  <title>Cookie Consent Box</title>
</head>

<body>
  <div class="wrapper">
    <img src="https://cdn-icons-png.flaticon.com/128/1047/1047711.png" alt="cookie" />
    <div class="content">
      <header>Cookies Consent</header>
      <p>We use our own and third-party cookies to personalize content and to analyze web traffic.</p>
      <div class="buttons">
        <button class="item">Accept</button>
        <a href="#" class="item">Reject</a>
      </div>
    </div>
  </div>
Styling the Popup with CSS
Now, use CSS to style the cookie consent popup to match your website’s design. This will control the visual appearance, positioning, and responsiveness of the popup.
* {
  padding: 0;
  margin: 0;
  box-sizing: border-box;
  font-family: "Poppins", sans-serif;
}

body {
  display: flex;
  justify-content: center;
  align-items: center;
  background: #212529;
  min-height: 100vh;
}

.wrapper {
  position: absolute;
  max-width: 365px;
  background: #fff;
  border: 5px solid #fca311;
  padding: 25px 25px 30px 25px;
  border-radius: 15px;
  box-shadow: 1px 7px 14px -5px rgba(0, 0, 0, 0.15);
  text-align: center;
}
.wrapper.hide {
  opacity: 0;
  pointer-events: none;
  transform: scale(0.8);
  transition: all 0.3s ease;
}
::selection {
  color: #fff;
  background: #212529;
}
.wrapper img {
  max-width: 90px;
}
.content header {
  font-size: 25px;
  font-weight: 600;
}
.content {
  margin-top: 10px;
}
.content p {
  text-align: justify;
  color: #858585;
  margin: 5px 0 20px 0;
}
.content .buttons {
  display: flex;
  align-items: center;
  justify-content: center;
}
.buttons button {
  padding: 10px 20px;
  border: none;
  outline: none;
  color: #212529;
  font-size: 16px;
  font-weight: 500;
  border-radius: 5px;
  background: #fcba7f;
  cursor: pointer;
  transition: all 0.3s ease;
}
.buttons button:hover {
  transform: scale(0.97);
}
.buttons .item {
  margin: 0 10px;
}
.buttons a {
  text-decoration: none;
  padding: 10px 20px;
  border-radius: 5px;
  color: #212529;
  background: #e9ecef;
}
Implementing the JavaScript Functionality
Finally, implement the JavaScript functionality to handle cookie consent. This includes setting cookies, checking for existing consent, and hiding or showing the popup accordingly.
const cookieBox = document.querySelector(".wrapper"),
  acceptBtn = cookieBox.querySelector("button");
acceptBtn.onclick = () => {
  document.cookie = "CookieBy=FaridVatani; max-age=" + 60 * 60 * 24 * 30;
  if (document.cookie) {
    cookieBox.classList.add("hide");
  } else {
    alert(
      "Cookie can't be set! Please unblock this site from the cookie setting of your browser."
    );
  }
};
let checkCookie = document.cookie.indexOf("CookieBy=FaridVatani");
checkCookie != -1
  ? cookieBox.classList.add("hide")
  : cookieBox.classList.remove("hide");
Adding Footer Assets
Include any JavaScript assets needed for functionality, placing these before the closing <body> tag.
By following these steps, you have successfully created a functional and visually appealing Cookie Consent Popup In Javascript for your website.


